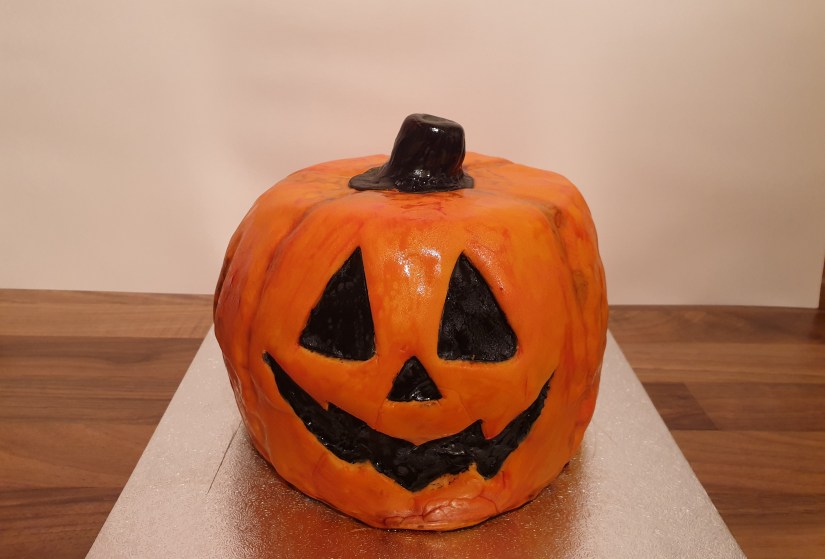
I have always wanted to make an illusion cake so I took the leap and decided to make a carved pumpkin illusion cake. For this cake I decided on a chocolate sponge with peanut butter frosting as chocolate and peanut butter are my favourite cake flavours.
I was really pleased with how this one turned out and I will be looking to create more illusion cakes in the future. More recipes coming soon…
For this cake, I used two deep 8 inch cake tins. If your tins are bigger or smaller, adjust the ingredients accordingly.
Ingredients
For the chocolate cake:
- 340g unsalted butter, softened
- 750g caster sugar
- 6 large eggs
- 500g plain flour
- 125g cocoa powder
- 3 tsp baking powder
- 2 tsp bicarbonate of soda
- 1 tsp salt
- 720ml boiled water
For the peanut butter frosting:
- 175g unsalted butter, softened
- 375g peanut butter
- 275g icing sugar
- 5 tbsp double cream
- orange gel food colouring
For the decoration:
- 1kg soft fondant icing (white)
- gel food colouring – orange, green and black
- food grade alcohol (I used vodka)
Step 1 – preparation
Preheat your oven to 180ºC (fan oven 160ºC).
Line two 8 inch deep cake tins with greaseproof paper.
Step 2 – prepare the cakes
Sift the dry ingredients into a large bowl and mix together.
Poor the boiled water over the cocoa powder in a separate bowl and whisk until completely smooth.
Beat the butter and sugar in a stand mixer until light and fluffy (this should take about 5 minutes on a medium speed).
Gradually beat in the eggs one at a time (to avoid curdling).
Continue by adding the cocoa mixture and dry ingredients in four batches, beating the mixture on a slow speed after each addition. Take care not to overmix.
Divide the cake mixture evenly between the two cake tins.
Step 3 – bake
Bake the cakes for around 1 hour 20 minutes until fully baked (a skewer should come out clean once baked).
Cool for about 10 minutes in the tin before removing and leaving to cool fully on a cooling rack.
Step 4 – prepare the peanut butter frosting
Beat the butter and peanut butter in a stand mixer for a few minutes until pale.
Gradually beat in the icing sugar a little at a time until well combined.
Add the double cream and orange food colouring and continue to beat for about 5 minutes.
Step 5 – decorate and enjoy
Start by leveling your cakes and then slicing each cake into two equal layers.
Add a little bit of frosting to a cake board to keep your cake in place. Add your first layer and top with a layer of frosting. Continue alternating the layers with the buttercream until the final top layer is added.
Refrigerate your cake for half an hour before carving to help it keep its shape.
Using a serrated knife, carve your cake so it roughly resembles the shape of a pumpkin. Take your time with this step.
Once you’re happy with the shape, crumb coat your cake with the remaining peanut butter frosting.
Colour about 750g of the soft fondant orange, 200g black and 50g dark green.
Roll out the orange icing and cover the cake.
Using a template, cut out the carving features from the orange icing and replace with the black fondant.
Create a stem with the green fondant and top the cake with it.
Finish by painting the fondant with gel food colouring mixed with vodka to make it look more realistic.
Enjoy!